|
Avatar SDK Offline Unity plugin
1.9.1
animted_face and head_1.2 pipelines
|
|
Avatar SDK Offline Unity plugin
1.9.1
animted_face and head_1.2 pipelines
|
This scene shows how an avatar (Animated Face pipeline) can be easily attached to a fullbody character in runtime and animated with skeletal animations.
It is a legacy solution that doesn't give a seamless connection between the head and the body. We recommend you to use a fullbody pipeline that is available in the Cloud SDK: https://accounts.avatarsdk.com/developer/#unity-plugin.
BodyAttachment script component and press Rebuild Bindpose button on this component. Press Save and restart the scene. Please contact us if this does not fix the issue.The user interface on the left allows you to manipulate the relative position of the head once it attached, in realtime. It is implemented via manipulation of the 4x4 bindpose matrix. Take a look at PositionControl.cs and ChangePosition method in BodyAttachment.cs to see the implementation details. If you run the sample in the Unity Editor, there is a possibility to create a prefab object. Just press the corresponding button in the bottom right corner.
The cartoon dummy character is added to the scene as a reference, to demonstrate how the idle animation is played back on its original model.
From the developer point of view, this is how it's supposed to work for new characters:

BodyAttachment.cs script component to it. 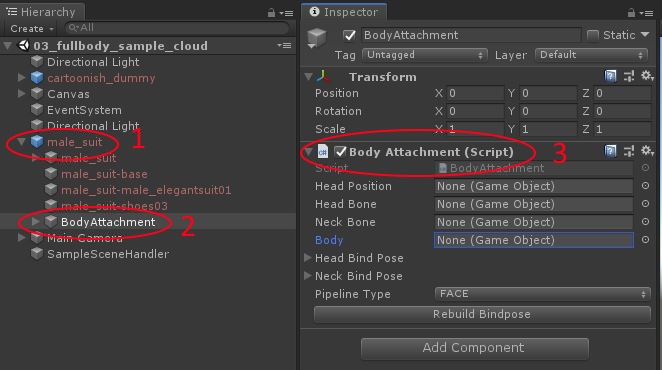
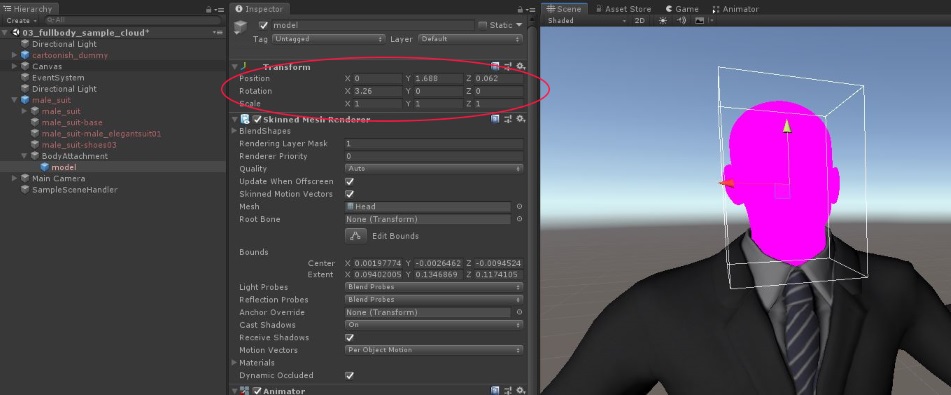
BodyAttachment add a sample AvatarSDK head (you can save your own to the prefab or use the sample head from the folder itseez3d\avatar_sdk\samples_core\models\sample_heads\animated_face just like it's done in the sample 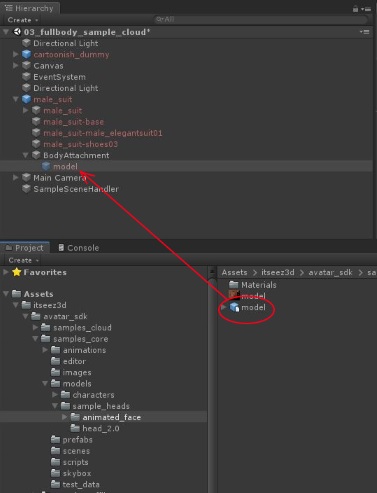
BodyAttachment script component and fill the public fields of the object: head transform, head and neck bones and you fullbody object (the one that contains the SkinnedMeshRenderer body component, again, just like in the sample). Leave Head Bind Pose and Neck Bind Pose fields unchanged for now. 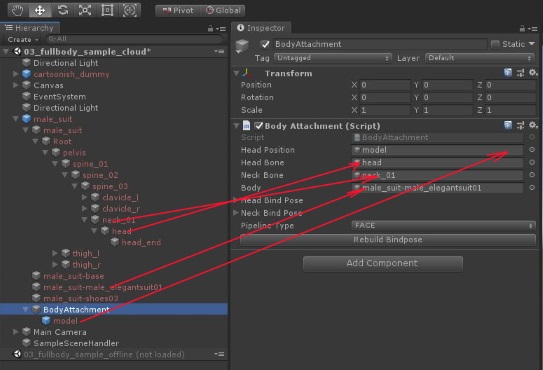
Rebuild Bindpose. This is very important - this is where script calculates the correct 4x4 matrices that will attach the runtime-generated avatar head in the right place and to the right bones. 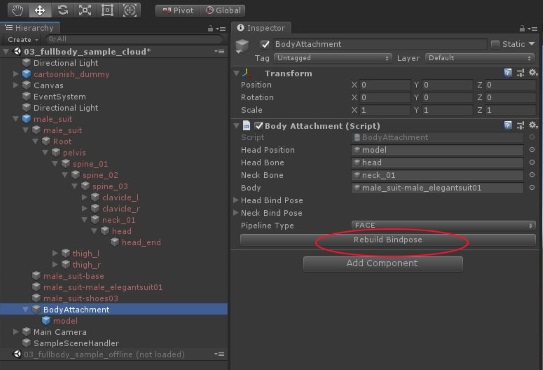
AttachHeadToBody and pass the head GameObject. Method DisplayHead of FullbodySample.cs demonstrates how to do this.See also FAQ and the getting started instructions on the main page: Main Page.
 1.8.14