|
Avatar SDK Unity Cloud plugin
3.0.1
Realistic avatar generation toolset for Unity3D
|
|
Avatar SDK Unity Cloud plugin
3.0.1
Realistic avatar generation toolset for Unity3D
|
We provide a set of scripts for using MetaPerson or FitPerson avatars with Oculus Hand Tracking.
1. Import Oculus Integration package into a Unity project. The latest version we have tested is v37.0.
2. Import Avatar SDK Oculus Hand Tracking package into the project.
3. Run the "Assets/itseez3d/avatar_sdk/oculus_hand_tracking/sample_scene/oculus_hand_tracking_sample.unity" sample.
4. By default the MetaPerson Male avatar is used. You can also enable the MetaPerson Female sample avatar or the FitPerson avatar in the Hierarchy window.
Follow these steps if you need to add a new model to the sample or to configure a hand tracking in your project.
1. Run the 09_fullbody_export_sample_cloud sample from the Avatar SDK Cloud plugin.
2. Generate an avatar in FBX format.
3. Import the generated avatar into a Unity project.
4. On the Inspector tab, set Animation Type to Humanoid for the imported avatar model and press Apply.
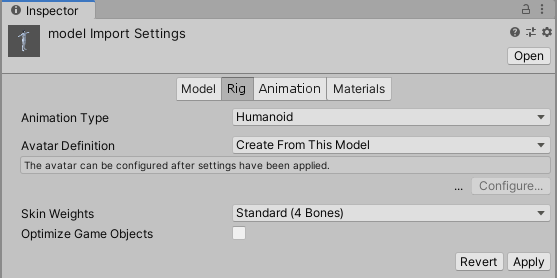
5. On the Inspector tab, press Configure button to adjust avatar definition.
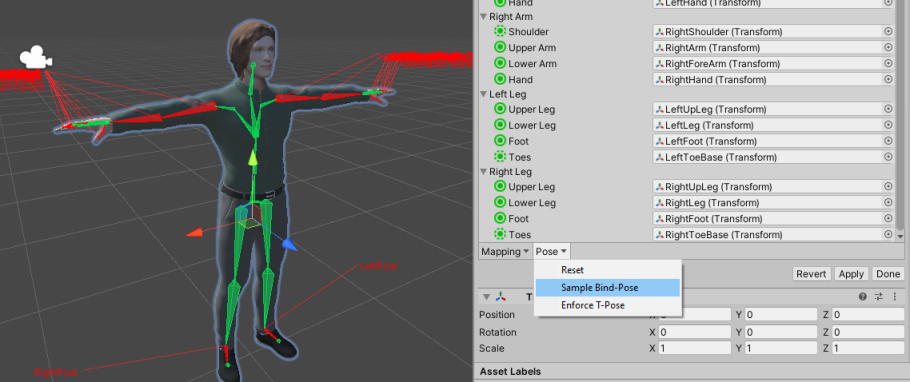
6. Set Pose to Sample Bind-Pose.
7. Import Oculus Integration package if it doesn't exist in the project.
8. Create a new scene or open an existing one.
9. On the Project tab, search for OVRCameraRig prefab and then drag it in the scene.
10. Add the avatar model as a child of the CeneterEyeAnchor object on the scene.
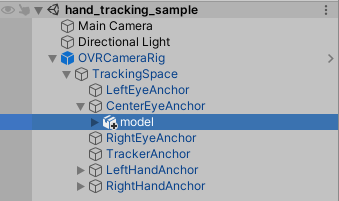
11. Modify avatar position to align a head with the CeneterEyeAnchor object.
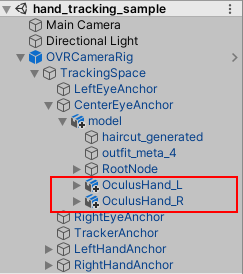
12. On the Project tab, search for OculusHand_L and OculusHand_R prefabs and drag them in the scene as childs of the avatar model object.
You can make these objects inactive once configuration is done.
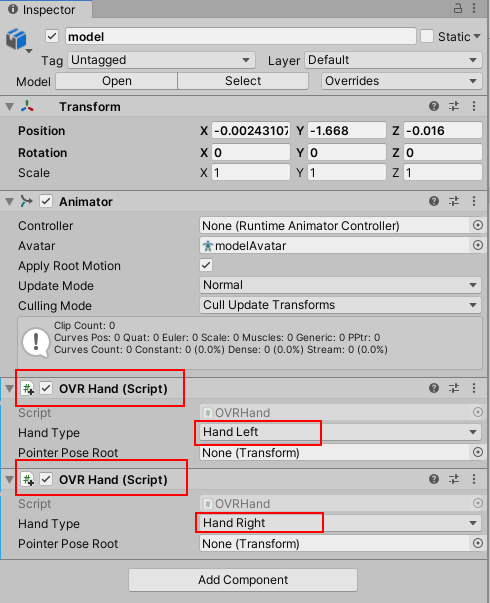
13. Add two OVRHand components to the model object. Set Hand Type to Hand Left and Hand Right for them respectively.
14. Add the Avatar SDK Hand Tracking component to the model object. Set Skeleton Type to Hand Left.
15. Set Left Hand transform as Avatar SDK Hand Root and set b_l_wrist as Oculus Hand Root as on the picture below.
16. Press Auto Map Bones to map bones between the Oculus left hand model and the avatar left hand model.
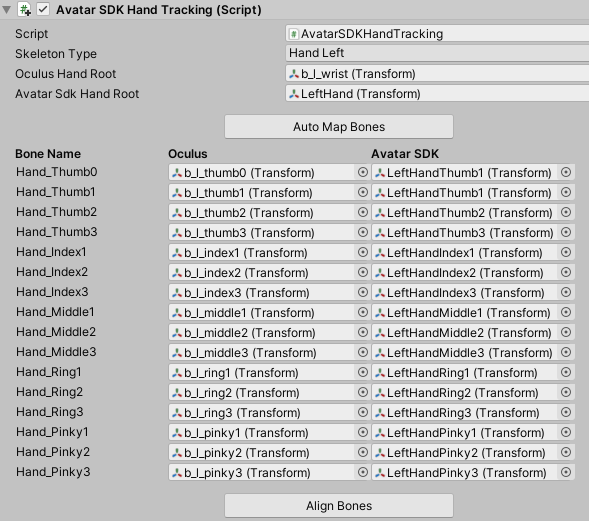
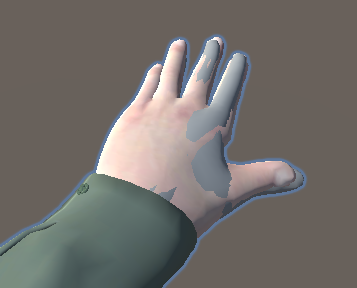
17. Press Align Bones button. The Oculus left hand model will be aligned the avatar left hand.
You can adjust rotations of avatar fingers bones manually to achive more accurate alignment. Do NOT modify bones of the Oculus hand.
18. Add another Avatar SDK Hand Tracking component to the model object. Set Skeleton Type to Hand Right.
19. Set Right Hand transform as Avatar SDK Hand Root and set b_r_wrist as Oculus Hand Root as on the picture below.
20. Press Auto Map Bones and then press Align Bones. Adjust fingers bones manually if required.
21. Now you need to assign and configure Animator Controller.
22. Create a new Animator Controller or use existing one.
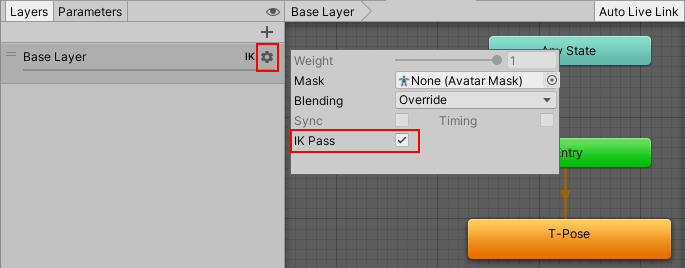
23. Add a new default state to the Animator Controller. Assign a Humanoud animation to this state. In the sample we use single frame T-Pose animations.
24. Enable IK Pass for the animation state.
25. Assign Animator Controller to the Animator component of the avatar model.

26. Run the the scene.
Contact us if you have any issues or questions: support@avatarsdk.com.
 1.8.14