|
Avatar SDK Unity Cloud plugin
3.0.1
Realistic avatar generation toolset for Unity3D
|
|
Avatar SDK Unity Cloud plugin
3.0.1
Realistic avatar generation toolset for Unity3D
|
This sample demonstrates how to create and use realistic 3D avatars with Avatar SDK and Photon multiplayer platform in Unity. Basic functionality is implemented in the sample: avatars are generated in two instances of the application running on different devices. An Avatar SDK Unity Cloud plugin is used for avatars generation: https://accounts.avatarsdk.com/developer/#unity-plugin . The user is allowed only to manipulate an avatar generated on his device. At the same time, both avatars are displayed on the scene and all transformations are reflected in the other avatar with the help of the Photon platform.
Please note that Photon PUN 2 Sample is compatible with Unity 2021.* onwards.
1) Download and import "Avatar SDK Photon PUN 2 Sample" plugin into your project with Avatar SDK. The sample can be found here:
Avatar SDK Photon PUN 2 Sample
2) Download and import "Photon PUN 2" plugin into your project with Avatar SDK. The plugin can be found at Unity Asset Store:
Photon PUN 2 Free
3) Open the Assets/itseez3d/avatar_sdk/samples_cloud/photon_pun_2_sample/Scenes/AvatarSdkPhotonSampleScene of Avatar SDK Photon PUN 2 Sample.
4) You need two instances of the application to see how the sample works. Both could be started on the same device. So first of all you need to build a standalone application and run it.
5) Generate the avatar in a standalone application.
6) Run another instance in Unity editor.
7) Generate the avatar in a Unity editor instance.
The result should look like this:
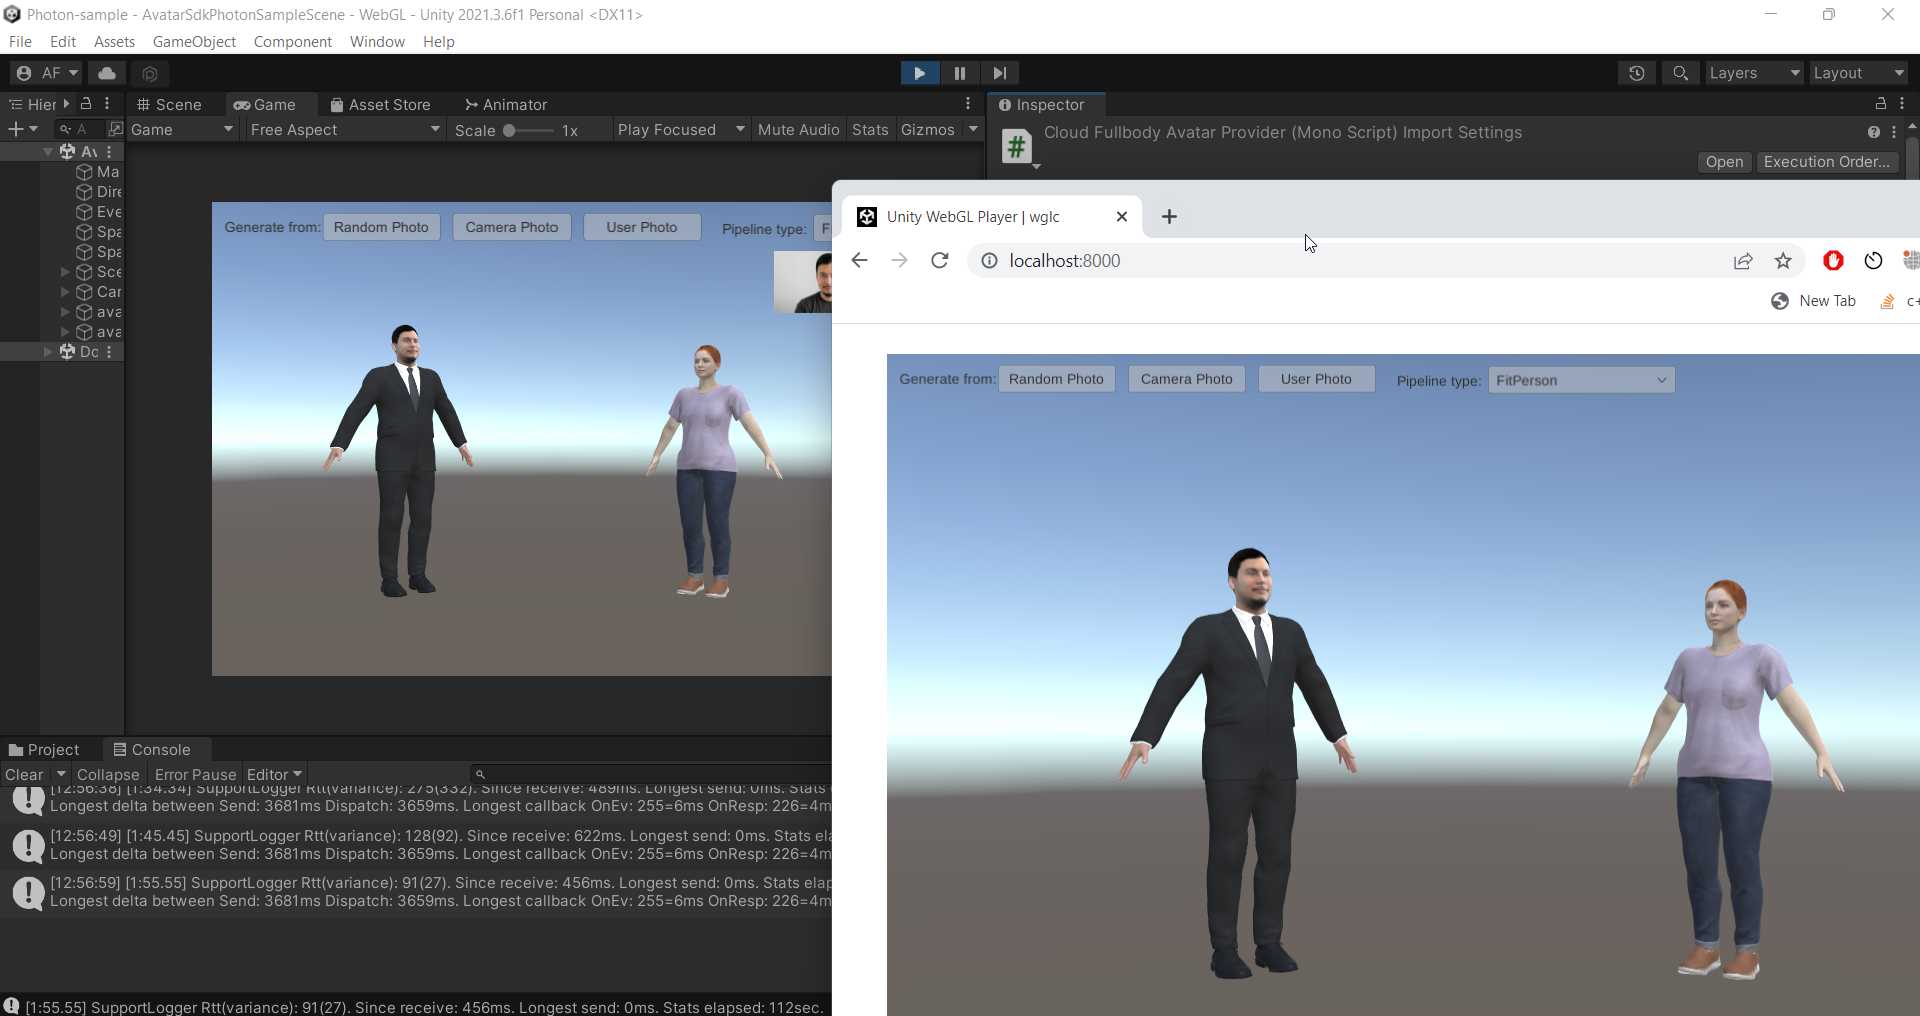
The key aspect of generating avatars in a multiplayer environment is that model is not available at the time of the starting process. In terms of Photon: we don't have a prefab to instantiate. In the sample, we use a dummy prefab that has an empty Game Object as a foundation. It also has an attached Photon View component that automatically handles synchronization of transformations (it will be a parent gameObject of generated avatar). We use the simple class Photon Avatar Notifier to raise an event when Photon instantiates the prefab. When the avatar is generated on the A client's side, we instantiate the prefab with PhotonNetwork.Instantiate method and pass the avatar's code and haircut id as "data" argument. The B client obtains the mentioned properties with the help of Photon and starts coroutines that download and display A client's avatar from Avatar SDK Cloud. This functionality is implemented in the basic Getting Started Sample, so to reuse the code we inherit our PhotonSampleSceneHandler class from the GettingStartedSample.
Using WebGL builds of sample requires some extra work to be done. The reason is the behavior of browsers, slowing down the refresh rate of inactive tabs. See the Photon documentation for more information: https://doc.photonengine.com/en-us/pun/current/demos-and-tutorials/webgl-tabsinbackground . For our part, we provide an html template containing additional scripts for handling the disconnection as described in the mentioned article. The archive with template is available at the following link: https://releases.avatarsdk.com/unity-plugin/samples/photon-webgl-html-template.zip . Put the index.html in place of the one generated by Unity in build destination folder.
 1.8.14