 |
Avatar SDK UE plugin
2.2.0
Realistic avatar generation toolset for Unreal Engine
|
 |
Avatar SDK UE plugin
2.2.0
Realistic avatar generation toolset for Unreal Engine
|
Most of the sample's functionality is implemented in the “MyAvatar” actor Blueprint. "MyAvatar” is just a demo of Avatar SDK UE Plugin toolset usage. It may be a good point to start the implementation of your Avatar generation workflow by simply modifying "MyAvatar”.
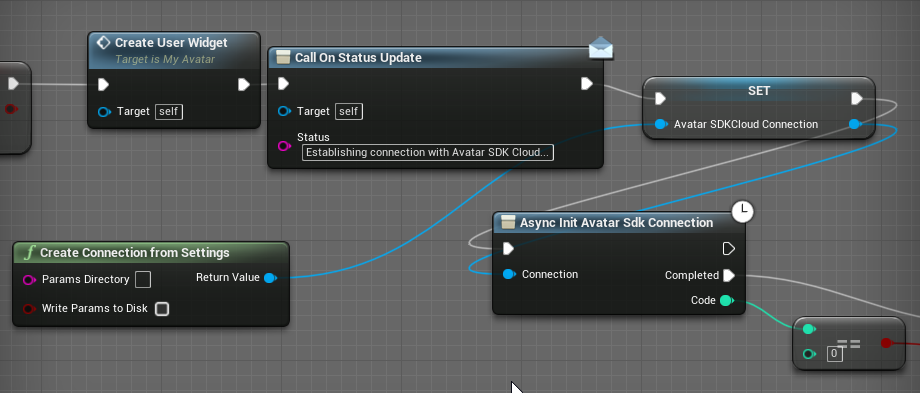
Before any of the UE Plugin methods can be used, you should correctly initialize UAvatarSDKCloudConnection for your app. Be sure to specifically set your Avatar SDK account ClientID and ClientSecret to the corresponding fields of Avatar SDK Plugin settings (see the Getting started). Create Connection From Settings function constructs the UAvatarSDKCloudConnection object with client id and client secret read from setting. Another option is to use the CreateConnection method and provide client id and client secret as its arguments. UAvatarSDKCloudConnection becomes initialized after the successful execution of the “Async Init Avatar SDK Connection” node. Initialization status is reported to the UI with help of the "Call on status" blueprint. The initialized connection is stored in the Avatar SDK Cloud Connection variable. It will be used in all Cloud API calls.
Now we need to construct avatar generation and export parameters. Before that, we call "Reset Avatar SDK Actor" and "Clear Morphs List" to ensure that our Actor and UI are in their initial states. We use "Async Get Available parameters" to request a list of parameters we can use for creating an avatar. Parameters are represented by FAvatarGenerationParams. We do not modify results in this sample and will request Cloud API to generate avatar with all available parameters (haircuts, blendshapes, model info), but you may set them up according to the needs of your application (please, refer to https://api.avatarsdk.com/#computation-parameters to get more information about computation parameters). The only thing to be configured here is Avatar Modifications: we need to provide desired values for parameters we want to control (detailed information is also presented here: https://api.avatarsdk.com/#avatar-modifications). An instance of AvatarModifications structure is being constructed to achieve this goal.
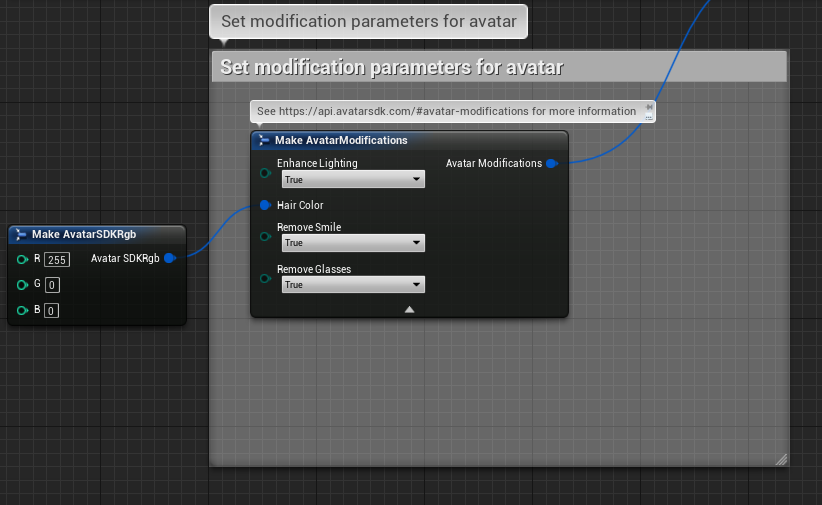
Here we ask Avatar SDK Cloud to remove the smile and glasses on the original selfie, enhance lighting and make the avatar's hair red.
Now is time to connect everything together: we use our parameters, modifications, and "Avatar Generation Params to Json" node to build JSON avatar computation parameters (see SetParametersMacro). 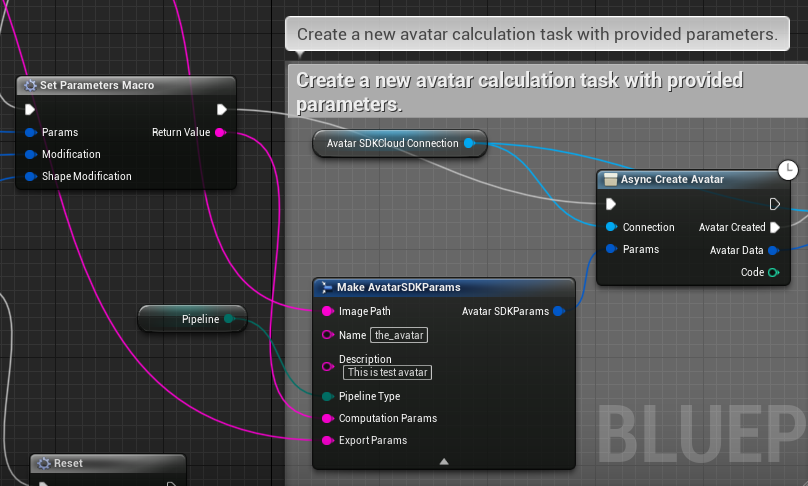
Setting up export parameters has same logic as setting up generation parameters. We obtain the list of available parameters and call SetUpAvatarExportParameters macro that builds resulting JSON. 
Finally, we make an instance of AvatarSDKParams structure that contains all of the required information about an avatar including a path to selfie pipeline type and JSON parameters generated in the previous step.
We use the "Async Create Avatar" node to create a new avatar calculation task. The "Await Avatar Calculation" node will help us to poll the created task's state and progress. Please note that correctly initialized AvatarSDKConnection (step 1) should be passed to all Blueprints nodes that have AvatarSDKConnection as a parameter.
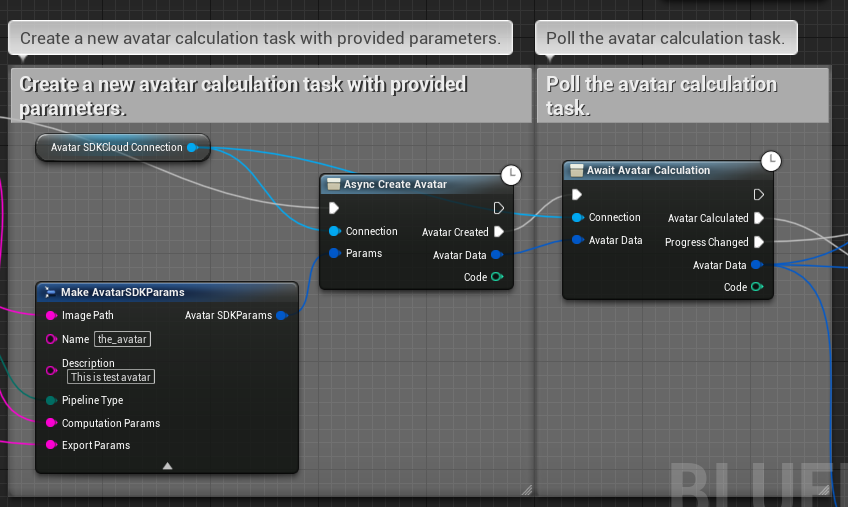
Its "Progress changed" delegate will be called every time it obtains new information about our avatar calculation progress (it will be written to the FAvatarData). In the sample, we use this information to print progress in the UI.
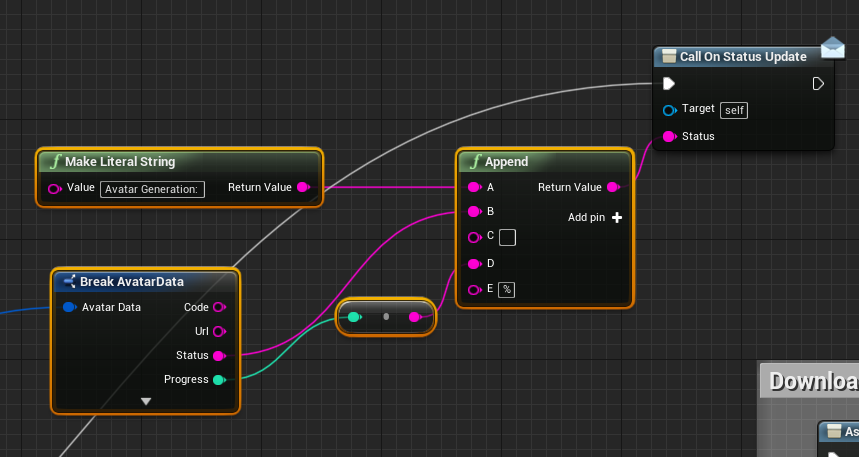
Once the avatar is ready, the "Avatar Created" delegate is called. We store the resulting AvatarData in the variable because we will need it for downloading files later. If you need to get the AvatarData for the avatar created earlier, you may use the UAsyncGetAvatarData blueprint node. Please keep in mind that the input parameter of type FAvatarData should contain the correct avatar code in the field "Code".
"Await Avatar Export" node works in the same manner as "Await Avatar Calculation". We store the result in a corresponding variable and now everything is ready to download. 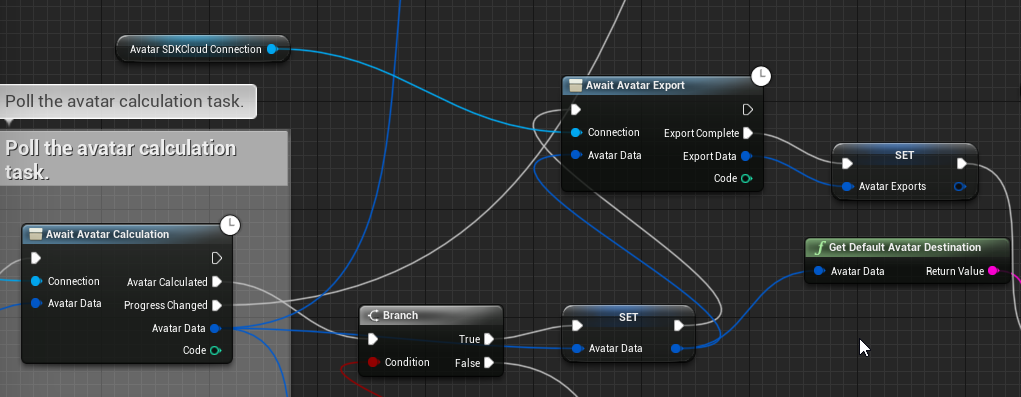
Downloading the results is pretty simple: we need to call the DownloadMeshMacro and provide it with Connection, Root path, LOD and Export Data. We already have the initialized connection and Export Data stored in the corresponding variables. LOD (level of details, see the Main page) parameter is applicable to head 2.0 and head 1.2 pipelines: you may choose a value for blendshapes and mesh. This parameter does not affect downloading other types of files. Files of chosen LOD are stored in the corresponding subdirectory of the avatar destination directory. 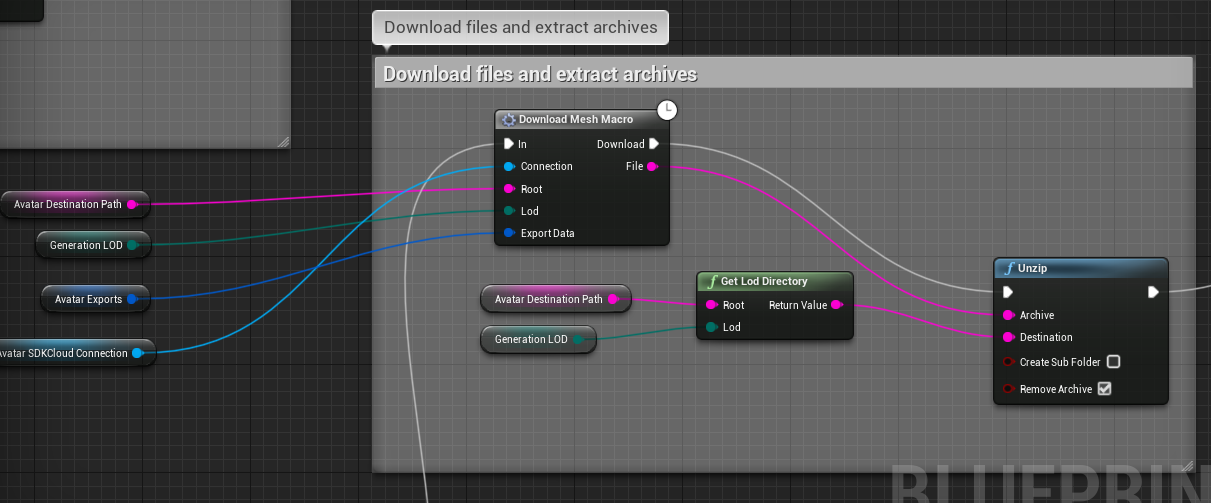
DownloadMeshMacro takes the "avatar" file from list of exports and calls AsyncGetAvatarFileByUrl node that handles downloading of the archive. Files from the archives need to be extracted, so we use the UE Plugin Unzip function to perform this task. 
Loading avatar data is pretty simple: AvatarSDKActor LoadAvatar method needs Path, AvatarData, Pipeline Type and LOD arguments we already have. AvatarSDKActor class inherits Unreal AActor and contains high-level functions for managing an instance of Avatar. Actor methods LoadAvatar, AddHair add corresponding mesh and texture elements to the avatar. It is worth mentioning that all of the added haircuts data is stored in memory until "Reset Avatar SDK Actor" is called. HasHaircut method may be used for checking out if a haircut was previously added to the actor. To display one of the added haircuts the SelectHair method should be used. Please note that Head 1.2 haircuts are integrated into the model, for head 2.0 avatars hairstyle is represented with a distinct mesh.
Avatar morphs are loaded automatically with the body mesh. Setting morph targets should be performed with the corresponding AvatarSDKActor SetMorphTarget method.
Head material is created inside of AAvatarSDKActor and is based on HeadMaterial. Working with haircuts materials is a little more tricky: for some of them we use one mesh, others need two copies of mesh with different materials based on HaircutMaterial and HaircutMaterialNoCulling (former uses custom depth, latter doesn’t). UAvatarHaircutsManager class is responsible for the selection of the way a haircut will be rendered.
There is some additional functionality implemented in the sample that is not a part of UE Plugin API, but may be considered as an example. Class AvatarSDKSamplePawn is responsible for AvatarSDKActor positioning on the scene: it implements rotation by mouse and encapsulates transformation logic. The haircuts component is an Actor Component that implements changing haircuts(it is enabled only for head 2.0 pipeline). When "Previous haircut" or "Next haircut" buttons are pressed, their "Press"-event handlers call HaircutsComponent's PreviousHaircut and NextHaircut methods. The class handles downloading of haircuts files, keeps a list of available haircuts and the name of the currently selected one.